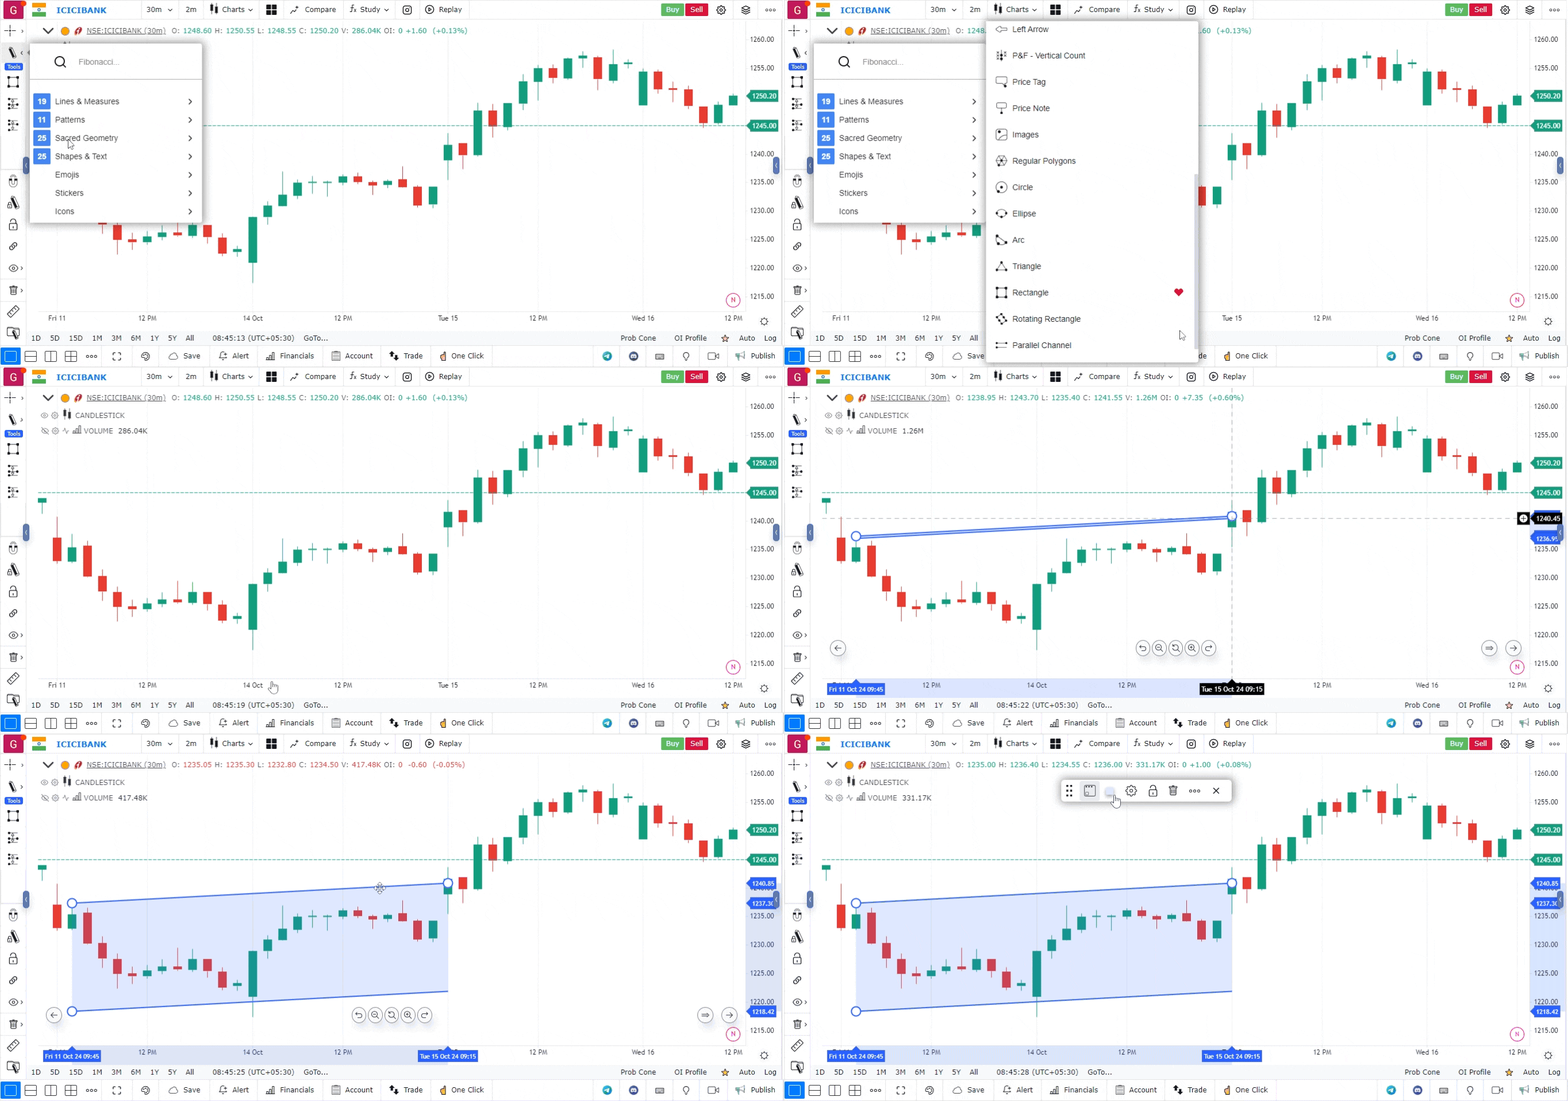
Parallel Channel Drawing Tool
-
Access the Drawing Tool Bar:
- On the chart interface, locate the drawing tool bar. It is positioned on the top left-hand side of the screen.
- Click on the drawing tool bar to expand the various drawing options available.
-
Locate the Parallel Channel Tool:
- In the expanded drawing tool bar, look for the section labeled “Shapes and Texts.”
- Click on it to view the available tools, and select the “Parallel Channel” option.
-
Drawing the Parallel Channel:
- To start drawing, click on the chart where you want to place the beginning of the channel (typically at a key low or high point).
- Move your cursor to draw the main trendline of the channel, defining the direction (upward or downward).
- Click again to fix the trendline in place.
- The tool will then automatically generate a parallel line at the opposite side of the channel.
- Adjust the width of the channel by dragging the parallel line to match the price range you want to cover.
-
Adjusting and Fine-Tuning the Channel:
- You can modify the position and width of the parallel channel by clicking and dragging its edges or control points.
- Ensure that the channel contains the most significant price action within its bounds to get accurate support and resistance levels.
-
Customizing the Parallel Channel:
- Right-click on the parallel channel to access customization options.
- You can change the color, line style, thickness, and other visual elements to match your chart’s aesthetic preferences.
- Label the channel if needed, to distinguish it from other chart annotations.
-
Using the Parallel Channel for Analysis:
- Use the parallel channel to identify potential support and resistance levels, as price tends to oscillate within the channel.
- Breakouts above or below the channel lines may indicate a trend reversal or acceleration in price movement.
