GoCharting: Connect with Broker
GoCharting allows you to connect your broker to the platform, enabling you to trade directly from charts. This feature is especially helpful for traders looking to execute trades quickly, making it ideal for scalping and enhancing trading convenience. Below, we will explore the broker connection process and the settings related to trading.
Connecting to a Broker
To connect your broker to GoCharting, follow these steps:
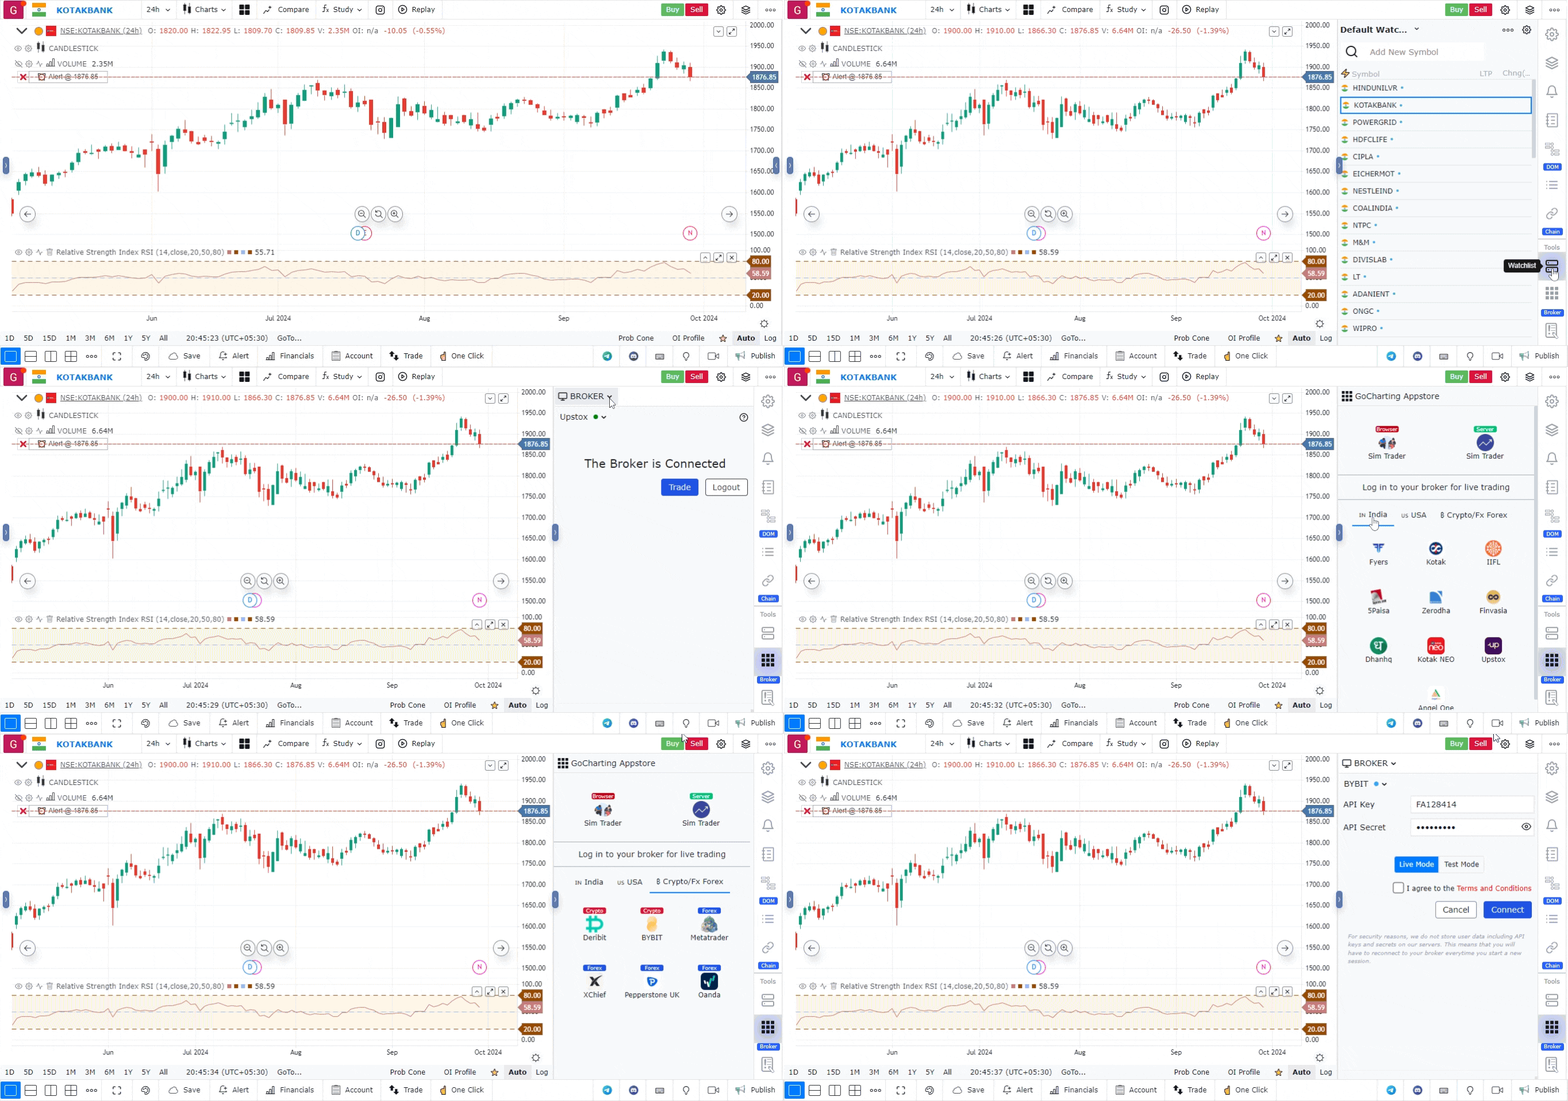
- Click on the Broker Section: Navigate to the widget bar and click on the “Broker” option.
- Choose a Broker: From the dropdown menu, select either the app store or directly choose a broker.
- Market Segmentation: Brokers are categorized based on market segments such as Indian, Forex, and US markets.
- Connect with Your Broker: Select your broker and follow the steps to connect. For each broker, you will find video tutorials that guide you through the connection process.

Trading and Broker Settings
To access the trading and broker settings:
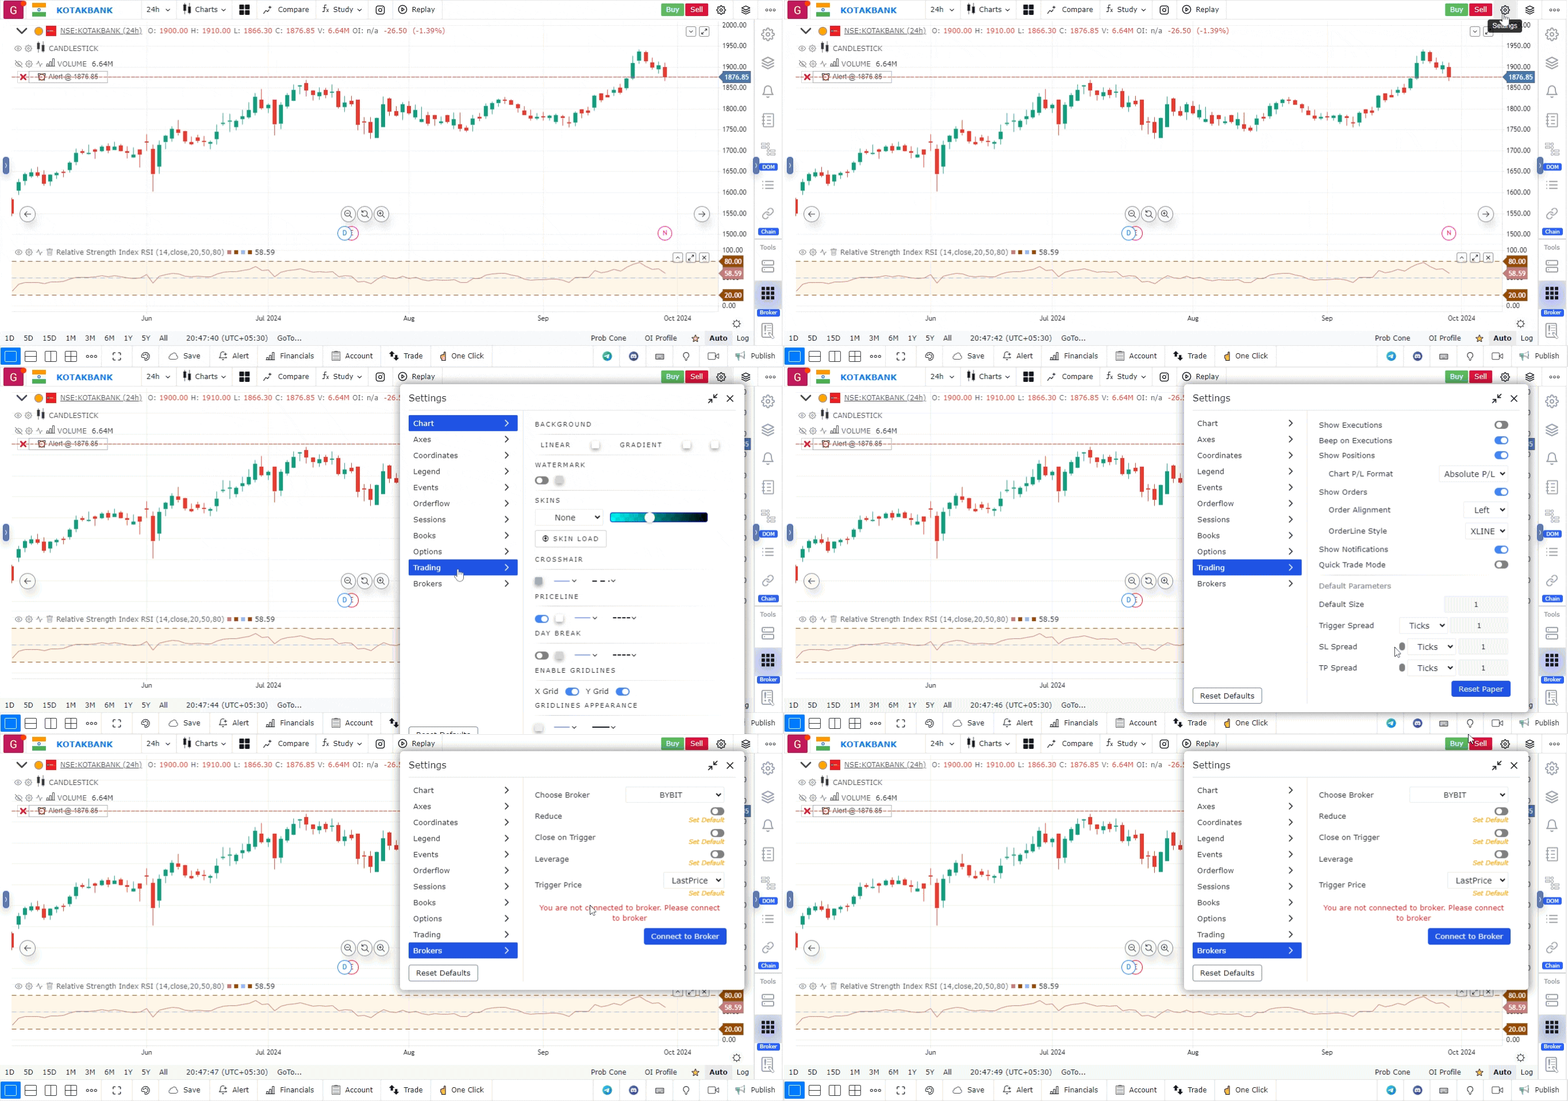
- Navigate to Settings: Click the settings icon in the top right corner.
- Select “Trading”: This will open the trading-related settings.

Available Trading Settings:
- Show Executions: Displays the price levels of executed trades on the chart.
- Beep on Execution: Provides an audible beep when a trade is executed.
- Show Position: Displays your open positions on the chart after trade execution. The PnL (Profit and Loss) format can be customized to show in ticks, absolute PnL, or percentage. You can also adjust the order line position (left/right) and choose the type (ray or xline).
- Show Notification: Displays notifications upon trade execution.
- Quick Trade Mode: When enabled, orders can be placed directly without filling in the trading panel. You can simply right-click a price level to buy or sell instantly, making this feature ideal for quick trades or scalping.
- Default Size: Set the default trade size for instruments.
- Trigger Spread: For stop-loss orders, GoCharting provides two types: market stop-loss and limit stop-loss orders. This setting allows you to define the spread between the limit price and the trigger price for limit stop-loss orders.
- SL Spread: Useful in bracket orders, this setting allows you to define stop-loss values based on actual price, offset price, number of ticks, or percentage.
- TP Spread: Similar to SL Spread, but for take-profit values in bracket orders.
Broker Settings
In the broker settings, you can reconnect with your broker and set default trading parameters. As shown below, you can customize the following settings:
- Product Type
- Disclosed Quantity
- Offline Orders
- Iceberg Orders
Trading Panels
GoCharting provides multiple ways to place orders. Below are three commonly used methods:
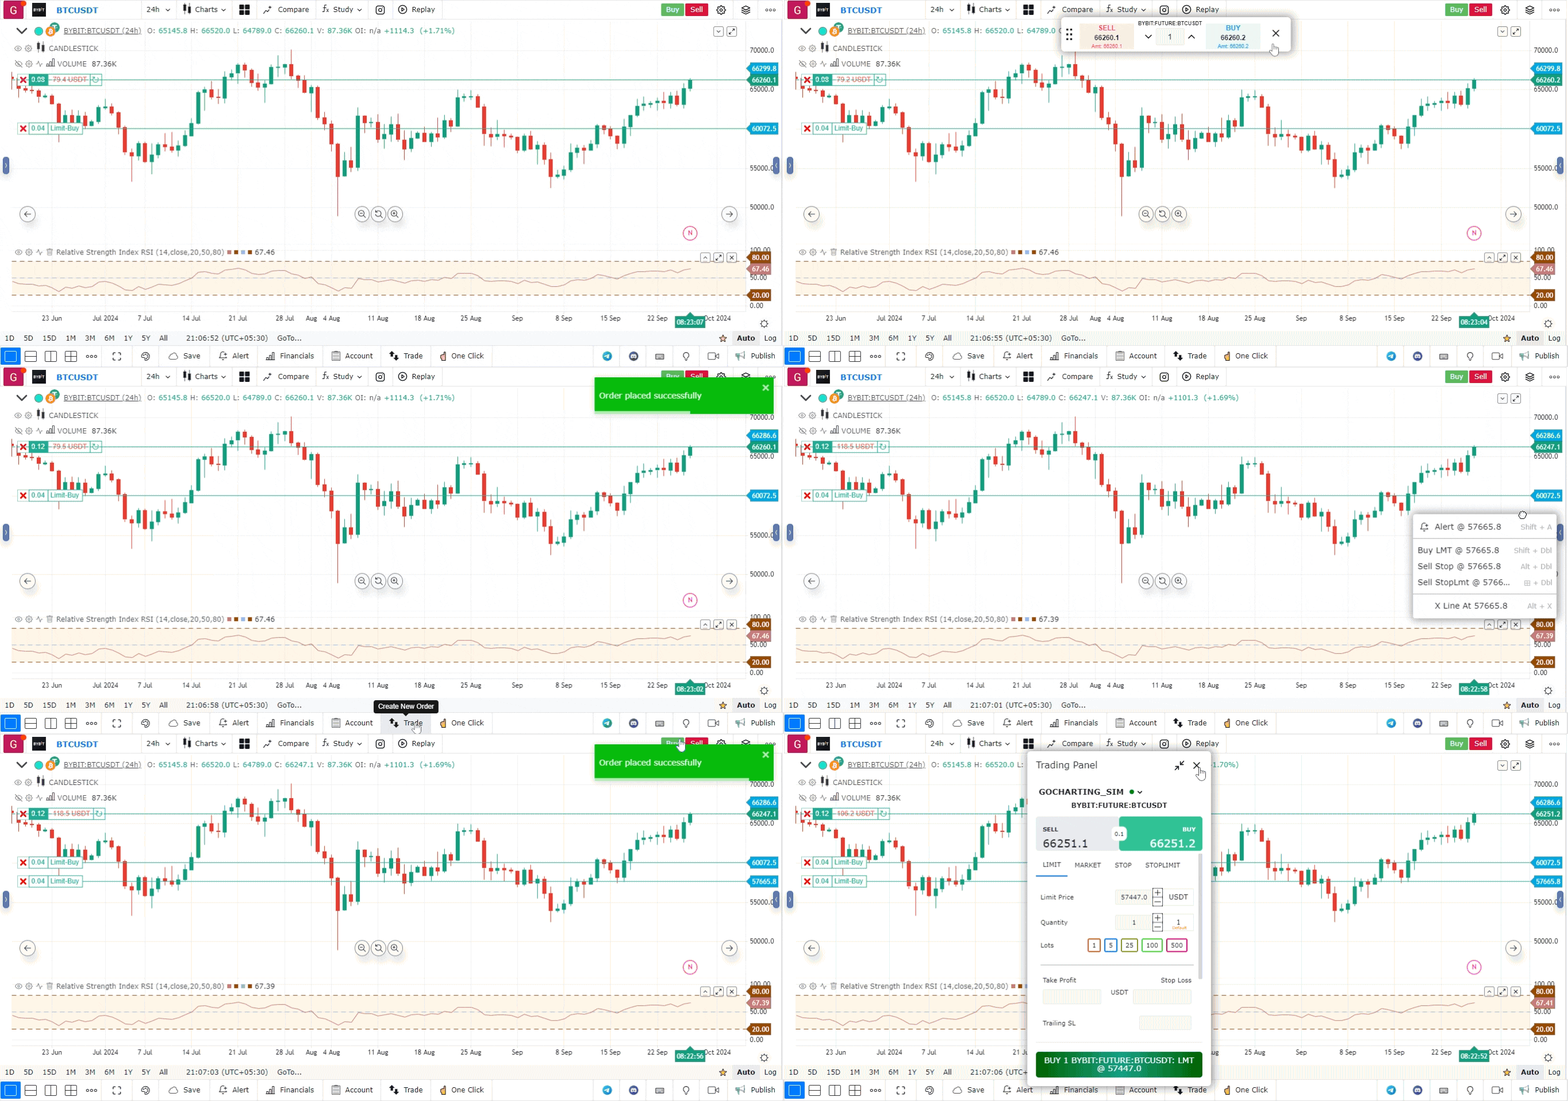
- One-Click Trade: Place market orders with a single click. This method does not support limit orders.
- Right-Click or Plus Button: Right-clicking on the chart at a specific price level allows you to initiate buy or sell orders based on that price. You can also use the plus button on the price axis. If the plus button is not visible, enable it from the axis settings in the settings menu.
- Trading Panel: This provides a detailed panel for placing buy and sell orders. You can specify the order type (limit, market, stop, stop-limit), product type, disclosed quantity, iceberg, and offline orders.
